

Jenkins download file from s3 - something
Avinash Barnwal's Blog
This is 3rd in series of articles written for Jenkins Continuous Integration tool. We already setup Jenkins, setup Android SDK, Gradle home, and a Test Jenkins build to archive the artifacts so far.
In this tutorial I am going to setup a AWS S3 integration from the same build to be able to archive the artifacts to S3 Bucket.
Here is a list of topics we would cover in this tutorial to achieve S3 archiving: –
- Create a S3 bucket.
- Create an IAM User , Access Key and assign a Managed Policy to Read/Write to the specific folder.
- Install S3 Plugin on Jenkins
- Configure the S3 profile
- Configure a Post-Build Step to upload output to S3 bucket.
Lets start now !
Step 1 – Create a S3 Bucket
What is S3 Bucket and why is it needed ? Before you can upload data into Amazon S3, we need to create a bucket to store the data. Buckets have configuration properties, including their geographical region, who has access to the objects in the bucket, and other metadata, such as the storage class of the objects in the bucket.
Create a Bucket
1. Sign in to the AWS Management Console and open the Amazon S3 console at https://console.aws.amazon.com/s3/.
2. Click “Create Bucket”

3. Select Bucket name and Region. The name that you choose must be unique across all existing bucket names in Amazon S3 and remember to use only lowercase chars as it doesn’t accept certain combinations. .
4. Create the bucket with or without logging as per your choice.
5. Create a folder (all lowercase to avoid any ‘Access Denied’ errors). we would choose ‘apkarchive’.
6. If all was successful, AWS console should show as below.
Step 2 – Create an IAM User and assign a Group & Policy to Read/Write to the specific folder.
Step 2A – To Create IAM User(s) with AWS IAM console
1. Sign in to the Identity and Access Management (IAM) console at https://console.aws.amazon.com/iam/.
2. In the navigation pane, choose Users and then choose Create New Users.
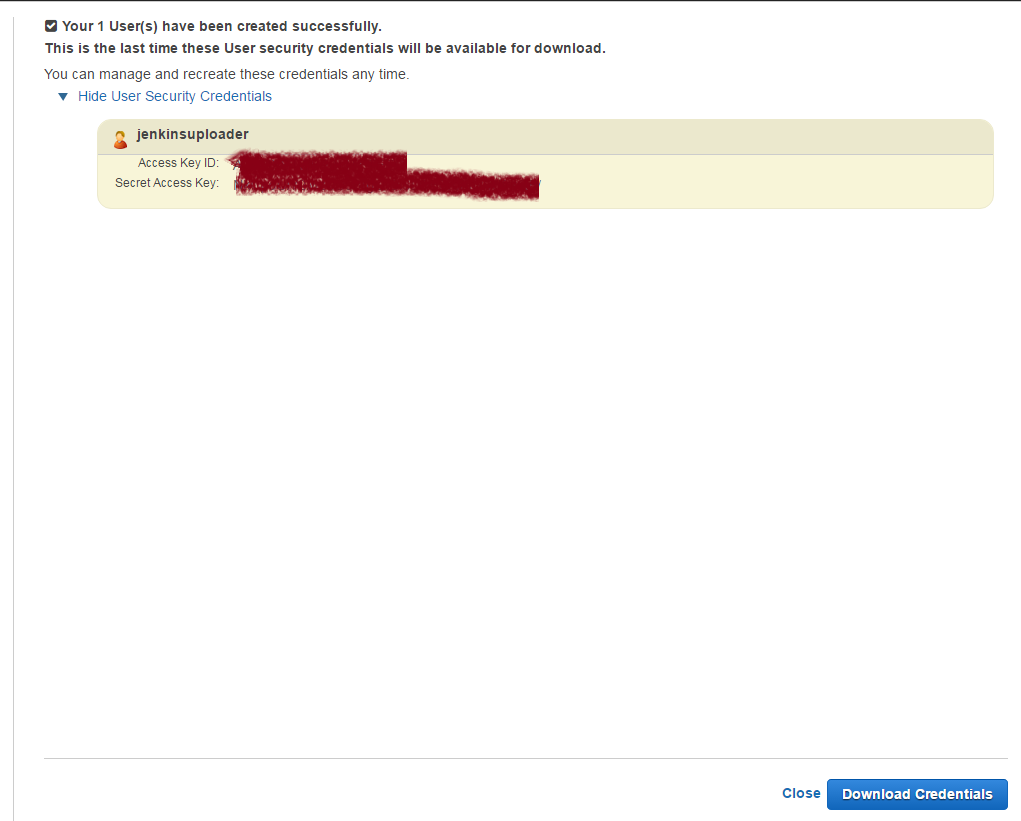
3. Type in user name = jenkinsuploader
4. Since our user would need to access AWS API from S3 plugin, we would need to generate access keys. To generate access key for new users at this time, select Generate an access key for each user. Remember that you will not have access to the secret access keys again after this step. if you lose them, you need to create a new Access Key for this IAM User.
5. Choose Create and then either show Key or Download Credentials in form of CSV.
6. Since we want to use just this IAM User for POC, we would be assigning the Managed Policy specific to the user. However, it is recommended to assign Managed policies to Groups and then map the users to the Group. Proceed to next step (Step 2B) to Create and Assign a Policy.

Step 2B – Create a Customer policy and Assign to user
- Sign in to the Identity and Access Management (IAM) console athttps://console.aws.amazon.com/iam/.
- In the navigation pane, choose Policies and then choose Create Policy
- Select ‘Create your Own Policy’ and select policy name as ‘apkUploaders’ and paste the below JSON as Policy Document
4. Go to “Attached Entities” Tab and “Attach” to the IAM user we created in Step 2A above.

PS – Since the jenkins uploader user would not be logging in from AWS Console, it doesn’t need a password, and also doesn’t need most of the privileges needed for accessing the documents/ objects via AWS S3 Console. If you need to Create a set of users who can view the documents / objects / build outputs via AWS S3 console, you may be better off creating a Group and then mapping a more liberal Policy document (I would try to cover it in my next blog).
With this step the S3 bucket and our IAM user access id and secret keys are ready to be configured on Jenkins, so lets proceed to next step.
Step 3 – Install S3 Plugin
Logon to Jenkins Dashboard with administrative id and perform below steps to download S3 plugin automatically.
- navigate to Jenkins dashboard -> Manage Jenkins -> Manage Plugins and select available tab. Look for “S3 plugin” and install that.
- You could also download the HPI file from S3 plugin URL and paste in Plugins directory of the Jenkins installation.
- Once done installation, restart Jenkins to take effect.
Step 4 – Configure the S3 profile
Go to Manage Jenkins and select “Configure System” and look for “Amazon S3 Profiles” section. Provide a profile name, access key and secret access key for your jenkinsuploader account that we created above.

Step 5. Configure a Post-Build Step to upload APK to S3 bucket.
Head to the existing build configuration, we would take ‘trav’ configuration as we built in my previous tutorial Part 2 – Jenkins – Setting up Android build. Navigate down to “Post-Build Actions” and click on “Add Post-Build Action” and select “Publish Artifacts to S3 Bucket” step. Provide params as below
Source – **/*.apk (it does accept the GLOB format wildcard)
Destination – bucketname/foldername format (The plugin accepts bucketname followed by absolute path to the folder in which the build output has to be archived)
Storage Class – Standard
Bucket Region – Depending on your bucket’s region.
Manage artifacts – true (This would ensure the S3 Plugin manages and keeps the build outputs as per the Jenkins archival policy)
Server side encryption – True / False (as per your bucket’s encryption policy)

Now, click on save and you are done !!
All your build artifacts will get uploaded to Amazon S3 bucket.

As always, happy reading and feel free to provide feedback
References
- Writing IAM Policies: Grant Access to User-Specific Folders in an Amazon S3
- BucketWriting IAM Policies: How to Grant Access to an Amazon S3 Bucket
- IAM Policy Variables Overview
- Specifying Permissions in a Policy
- AWS Policy Generator Tool
- An Example Walkthrough: Using user policies to control access to your bucket
- Working with Managed Policies

-