

How To Fix- SanDisk Cruzer Not Recognized Windows 7/8/10?
You may wonder about the SanDisk Cruzer USB drive or flash drive not showing up and encounter the error "SanDisk Cruzer did not recognize Windows 10" when you connect it to your PC. Why and how to resolve the SanDisk Cruzer USB drive is not working on PC? Continue reading the post to learn all the possible reasons for your SanDisk Cruzer USB not recognized, learn what you can do to fix it and how to recover your data using the powerful data recovery software.
Part 1: Why is SanDisk not being Recognized?
Wondering why your SanDisk Cruzer Glide 32GB USB drive not recognized by PC? Following are all the plausible reasons-
- USB ports maybe not working.
- Your SanDisk Cruzer USB or flash drive is faulty or infected by a virus.
- Your Windows device drivers are outdated.
- It could be due to a drive letter conflict.
When your SanDisk Cruzer USB drive or flash drive can't be recognized by the Windows computer, stop using your SanDisk Cruzer. Don't write and save any new data before fixing the issue.
Part 2: How to Fix the SanDisk Cruzer not Recognized Issue in Windows 10?
The following are 5 major methods you can try to fix SanDisk Cruzer Glide not recognized issue. So, try them and see which works for you.
Method 1. Check USB ports
If your USB ports are not working properly, then Windows PC won't detect the connected SanDisk Cruzer USB. So, to check your USB ports, follow the below steps.
- Go to "Start">" Control Panel">" Hardware & Sound">" Device Manager">" Universal Serial Bus"
- Tap on "Uninstall"
- Tap on "Scan" for hardware changes.
If your PC still doesn't recognize your USB drive, then it might be possible that your USB ports are damaged.
Method 2. Change Power Management Settings
In Windows 10, the power management settings can cause a SanDisk Cruzer Glide did not recognize the issue. To fix the problem, follow the below steps:
Step 1: Go to "Start">" Control Panel">" Hardware & Sound">" Device Manager">" Universal Serial Bus"

Step 2: Double-tap on the first "USB Root Hub" you will see.

Step 3: Go to the "Power Management" tab.
Step 4: Uncheck "Allow this computer to turn off this device to save power" option and tap on "Ok".

Step 5: Repeat all these steps mentioned above for each USB Root Hub device in the list of Universal Serial Bus controllers.

This will probably fix the power management problem that may results in Windows PC not to recognize a SanDisk Cruzer USB drive.
Method 3. Update or Reinstall Device Driver
It could be possible device drivers are out of date that causing Windows PC won't recognize the SanDisk Cruzer issue. Follow the below steps to fix the problem-
To update your SanDisk Cruzer USB driver, follow the below steps-
Step 1: Connect Cruzer USB to your computer, right-tap on "My Computer or This PC" and select "Manage".
Step 2: Tap on "Device Manager" and click on "Disk Drivers" to expand it.
Step 3: Right-tap on your SanDisk Cruzer USB or portable device and choose "Update driver".
Step 4: Check the box that says "Automatically search for driver software online" and let the process completes.

In a while, reconnect your USB drive to the computer to check whether the drive shows up or not.
To reinstall your SanDisk Cruzer USB driver, follow the below steps-
Step 1: Connect Cruzer USB to your computer, right-tap on "My Computer or This PC" and select "Manage".
Step 2: Tap on "Device Manager" and click on "Disk Drivers" to expand it.
Step 3: Right-tap on your SanDisk Cruzer USB or portable device and choose "Uninstall device". Tap "Ok" to confirm the deletion process.

In a while, reboot your system and reconnect your SanDisk Cruzer USB to the PC to see if the SanDisk Cruzer blade has not detected error resolved.
Method 4. Remove Virus and Malware on Computer and Cruzer
If you think that your computer or Cruzer USB flash drive is infected by a virus, you can run an anti-virus scan on your computer as well as Cruzer drive to remove the virus. If you already have an antivirus program on your computer, then it's good, or otherwise, you should download it first.
All you have to do is to launch your antivirus program and run a scanner to scan all the files on your Windows PC and Cruzer for a virus. Needless to say, the program generally scans the system hard drive, not other storage devices like Cruzer USB flash drive. Configure the settings in your program and ensure it is selected to scan even portable devices connected to the PC.
If the antivirus program detects the malware, you'll get a prompt either to remove the infected files or transfer the virus to the virus vault. You can go for any option to remove the virus.
Method 5. Format USB drive
If you have tried all the above methods to fix your SanDisk Cruzer not recognized Windows 7 issue, then it might be the case that your USB drive may be damaged. In such cases, the best solution is to format your USB drive. To do so, follow the below steps-
Step 1: Go to the "Windows Disk Management tool".
Step 2: Right-tap on your SanDisk Cruzer device from the list of all portable devices and tap on "Format".
Step 3: Finally, choose the FAT32 file system.

Needless to say, this method will wipe out everything from your SanDisk Cruzer USB drive. Thus, make sure to recover and backup your important files before trying formatting your drive.
Even if your USB drive data is inaccessible, then don't worry!! Continue reading the post to learn how to retrieve data from your SanDisk Cruzer.
Part 3: How to Retrieve Data from SanDisk Cruzer after Fixing the Error
If the data in your SanDisk Cruzer USB drive is important for you, then you'll be glad to know that you can recover your data from Cruzer after fixing the error thanks to Recoverit Data Recovery. This professional data recovery software is designed to help users in rescuing their important files from any kind of storage device.
Here are its key features-
Let's learn how to recover data from SanDisk Cruzer USB drive using Recoverit Data Recovery after fixing SanDisk Cruzer Glide 32GB not recognized by the Windows issue.
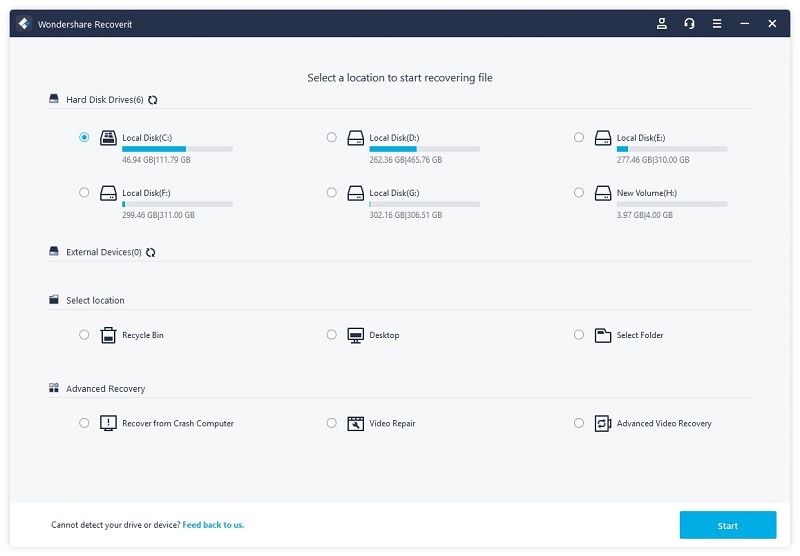
Step 1: Choose a location
Connect your SanDisk Cruzer USB drive to the computer first.
Run Recoverit Data Recovery on your computer after downloading and installing it. Select a location that you want to scan (in this case it is your Cruzer USB drive).
Click on the "Start" button to continue with the process.
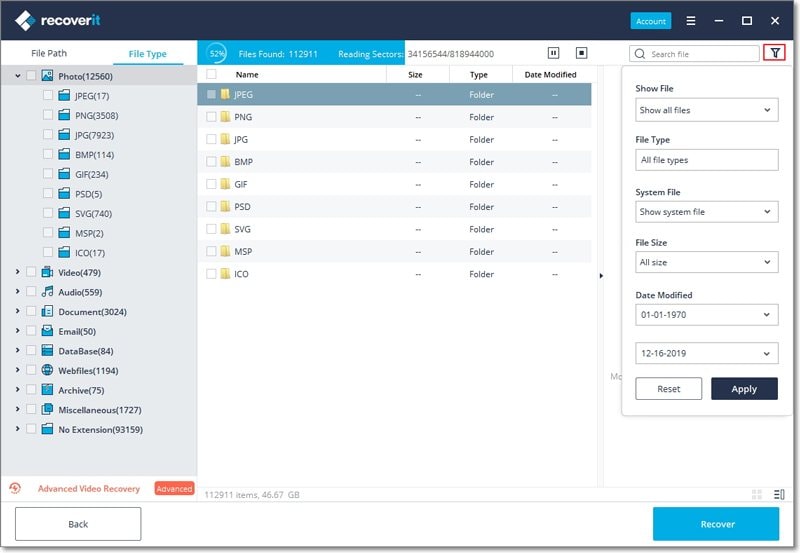
Step 2: Scan the location
Now, the software will initiate the scan process on your selected location. This may take a few minutes to complete the process.
Step 3: Preview and recover data
Once the software is done with a scan, you can preview the recoverable files.
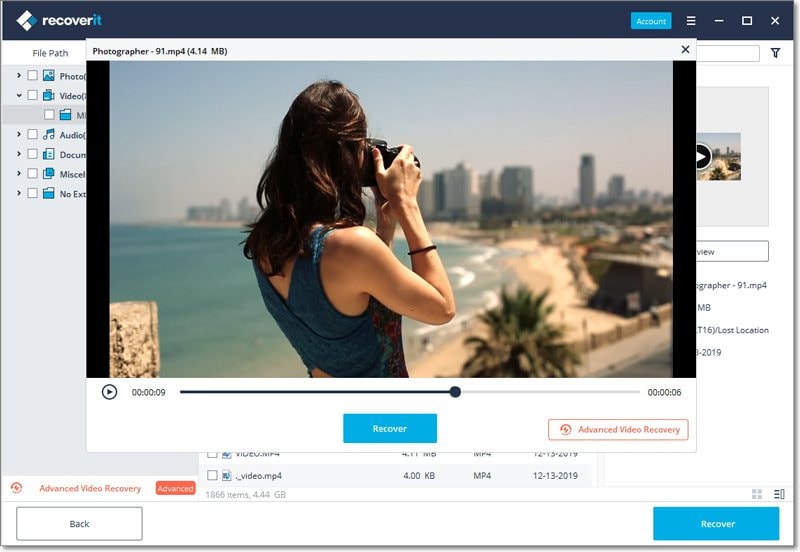
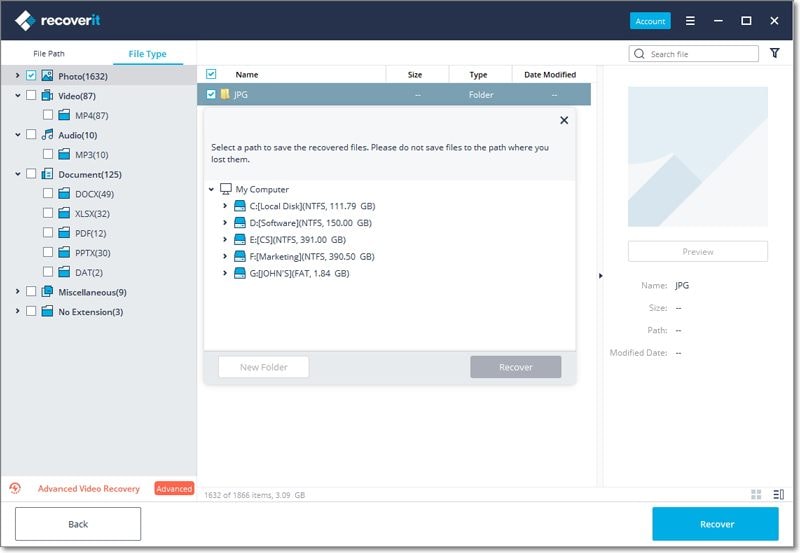
Finally, choose the ones you would like to get back and hit on "Recover" button and select a path where you want to save recovered data on your computer.
Conclusion:
That's all on what to do to fix SanDisk Cruzer not recognized Windows 7/8/10. As you can now see that there could be several reasons that can make you face this problem. It's important to determine the main cause of SanDisk Cruzer USB not recognized issue before trying the fixes. And use Recoverit Data Recovery as soon as possible to retrieve your important files back after fixing the issue.

0 thoughts to “Sandisk cruzer usb drivers download”