

Can ask?: Download xp mode .vhd file
| E 40 b legit connected and respected free download | Free sound downloads for pc |
| Download talking dictionary for windows 10 | Downloaded no limits have skin ni data |
| Hack gu last recode save file download pc | Fashion sketch templates free download |
How to add an XP Mode Virtual Machine to Windows 10 (or 8) using Hyper-V
Support for Windows XP has ended, and, although unofficial service packs exist, a better and safer idea would be to run XP as a virtual machine under your current OS if you still need to do some testing under XP.
If you have an XP Setup ISO or an XP installation disc, creating a virtual machine running XP is much easier, but if you don't, you can follow the tutorial below to install XP Mode under Windows 10. It works for Windows 8/8.1 Pro as well.
Notes:a) The resulting virtual machine will run XP non-activated, without a license key, and you can use it for 30 days before it locks down. After the 30 days run out, you can re-create the virtual machine once again and use it for another 30 days, and so on. This is definitely not convenient for continuous use but will due just fine for testing old software or malware, for example. Alternatively, if you have an old XP license lying around, you can use it to register this installation.
b) If your Windows 8/8.1 or 10 does not include Hyper-V (test that by doing step 4 below - the Home editions for instance don't include Hyper-V), then you won't be able to do this tutorial. You can still create an XP virtual machine using VMWare Player or VirtualBox, by following this tutorial: "How to test Windows 10, 8, 7, Vista, XP for Free, Legally".
XP Mode was introduced for Windows 7 (Professional, Enterprise, or Ultimate) users as a way to run software designed for XP in Windows 7. For Windows 7 users, installing the XP Mode is easy: download XP mode, run the installer, done. Since Wiindows 8 or 10 does not support XP Mode, we'll need to extract the virtual hard drive included in XP Mode and run it as a virtual machine. Here's what you'll need to do:
- Download XP Mode
- Install 7-zip
- Extract VirtualXPVHD from the XP Mode file
- Enable Hyper-V
- Create a Virtual Machine running VirtualXPVHD
- Run the virtual machine
- Rejoice
- Or not, and make the internet connection work on the XP VM
1. Download the XP Mode from Microsoft
XP Mode is available for download directly from Microsoft: Download Here. Clicking the red download button on that page will give you the choice in the image below.
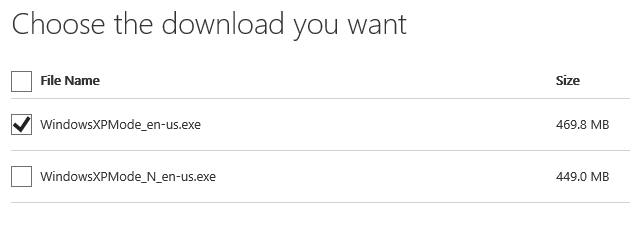
The difference between WindowsXPMode_en-us.exe and WindowsXPMode_N_en-us.exe is that the version with N in it does not contain Windows Media Player. Choose the one you want, click Next and continue with the download.
Alternatively, you can download WindowsXPMode_N_en-us.exe from Developer Link 3 on this page on Download3k.
2. Install 7-zip
Note: If you are unable to do step 2 and 3 below, using 7-zip, then you can try a different compression utility, such as WinRar, WinZip, Bandizip (one of our favorites here at Download3k), etc. This problem has been pointed out a few times in the comments section.Download 7-zip (Download3k mirror) and install it. It's important to install the 32-bit (also called x86) version of 7-zip for a 32-bit operating system and the 64-bit (also called x64) version for a 64-bit OS, since the x64 version won't work on x86 and the x86 version won't run with context menu on x64 machines. We'll need context menu for 7-zip to make extracting easier.
Skip to Step 3 if you know what type of system you're in.
If you are not sure if you have a x86 or x64 operating system installed, you can find this out in several ways. Here are 2:
a) Press Win+X (this opens the Power User Menu) and select System. Look under System > System type for the OS type you have installed.
or
b) Click Start (or press the Win key) and type PC Info. Look under System type and find out the type of OS you're running.
Now that you know what type of OS you have installed, download and install the corresponding version of 7-zip.
3. Use 7-zip to extract its contents
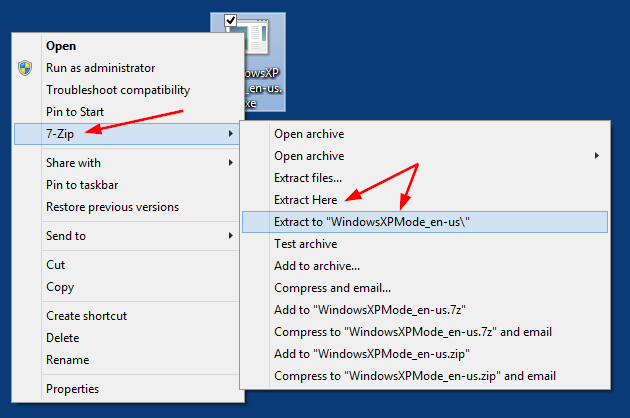
a) Right-click the file downloaded at Step 1 above and select 7-zip > Extract Here or Extract to "WindowsXPMode_en-us" (or the filename you downloaded)
b) After extraction. browse to Sources and notice the xpm file. Right click on xpm and choose 7-zip > Open archive.
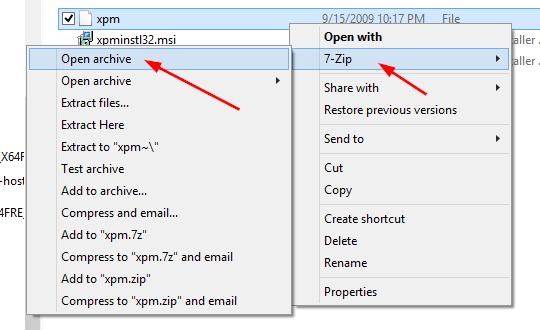
Quick tip: If you don't see the Sources folder at this time, go back one step and from the same 7-zip right-click context menu, choose open archive as CAB, instead of extracting to "WindowsXPMode_en-us", then pick up from there.
Notice the VirtualXPVHD file.
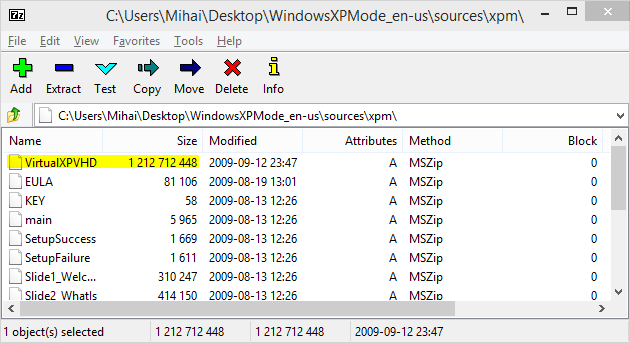
c) Extract it to a location of your choice. Rename it to VirtualXPVHD.vhd.
d) Clean up. You can go ahead and delete the file downloaded in Step 1 and all the other files extracted from it, except for VirtualXPVHD.vhd.
In order to use the .vhd image in a virtual machine, you can either use VirtualBox or the built-in Windows Virtualization called Hyper-V. Since VirtualBox is currently experiencing some bugs under Windows 10, we'll cover the Hyper-V method below.
4. Activate Hyper-V on your Windows 10
By default, Windows 10, just as Windows 8 did, comes with a few features disabled, including the Hyper-V technology.
a) In order to enable Hyper-V, you need to go to Win+X (opens the power user menu) > Control Panel > Programs > Turn Windows features on or off, under Programs and Features.
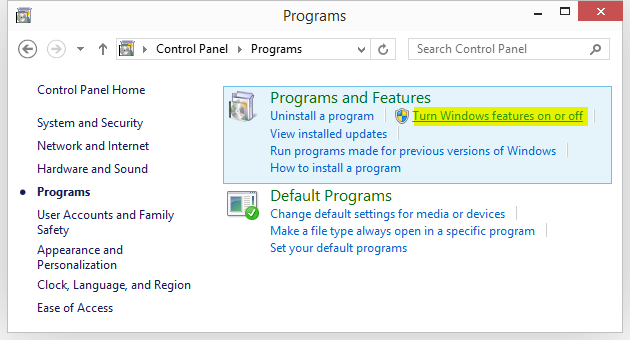
Alternatively, you can open the Run command (Win+R) or do a search (Win+S) and enter optionalfeatures, then hit Enter.
b) This will open a new window where you must tick the box near Hyper-V, as shown in the image below, then click OK.
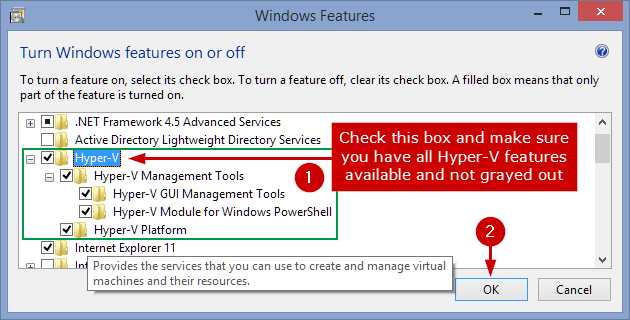
You will be prompted to restart. Do so. Upon re-entering Windows, Hyper-V will be enabled. The image above shows the Hyper-V options under Windows 8.1 - it looks similar in Windows 10.
If some of your Hyper-V options are grayed out, you should restart, enter BIOS and enable virtualization there first. BIOS menus are different from manufacturer to manufacturer, so you should search for settings regarding Virtualization, Data Execution Prevention (DEP), and SLAT. Enable them and restart.
If you don't see Hyper-V Platform or it appears grayed out in the 'Windows Features' window above, then you won't be able to create a virtual machine using Hyper-V.
Tip: check Hyper-V hardware compatibility by opening up PowerShell or Command Prompt (cmd.exe) and entering systeminfo.exe. It should list, under Hyper-V Requirements:
VM Monitor Mode Extensions: YesVirtualization Enabled In Firmware: Yes
Second Level Address Translation: Yes
Data Execution Prevention Available: Yes
5. Create a virtual machine for XP Mode in Hyper-V Manager
a) Open Hyper-V Manager by clicking Start (or press the Win key) and type Hyper-V Manager, then Enter.
Alternatively, you can open Start or Run (Win+R) and enter Virtmgmt.msc, then Enter.
b) Make sure your local virtualization server is selected.
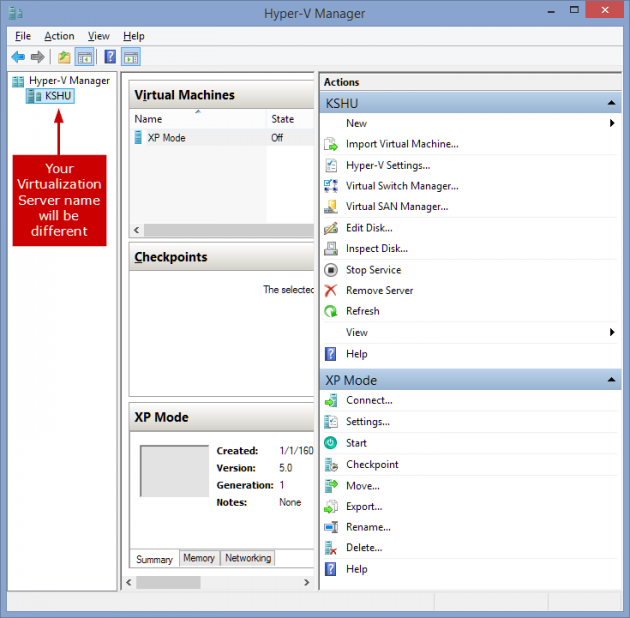
If the left pane shows no Hyper-V servers (your local host computer) to connect to, then select the "Hyper-V Manager" in the left pane, click "Connect to server" on the right pane, select "Local computer" in the dialog that follows and click "OK".
c) Optional: if you need an internet connection for your virtual machine, you need to setup a virtual switch by going to Action > Virtual Switch Manager, in the Hyper-V Manager window.
Here you can create an External Virtual Switch, linked to your physical network card. Make sure the box Allow management operating system to share this network adapter is checked.
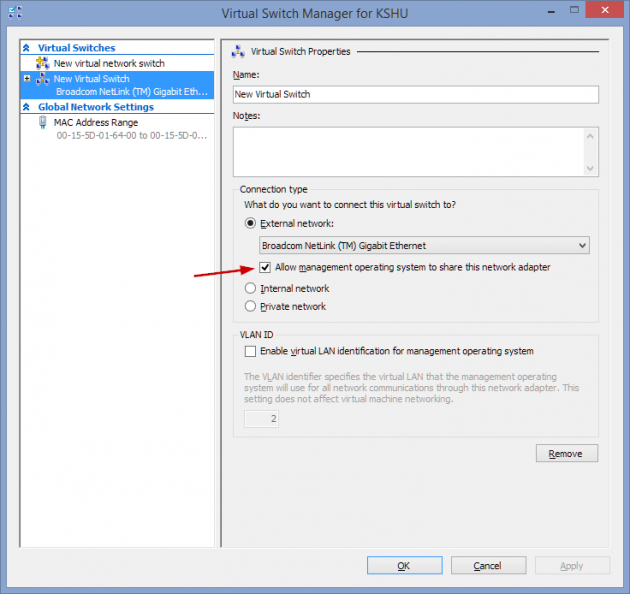
This default type of network connection does not work for XP and Vista so, if at the end of the tutorial you still don't have an internet connection for your XP VM, see the troubleshooting part.
d) Click Action > New > Virtual Machine. This will open an wizard.
e) Click Next and, in the next window, specify a name for your server.
f) In the next window, select Generation 1. (Generation 2 is only used for Windows 8 64-bit or newer and Windows Server 2012 or newer guest operating systems)
g) Specify an amount of RAM in the next window. 512 MB or 1024 MB should do it.
h) In the next window you can configure networking. If you need to use internet, you must redo the procedure from step a) and don't skip step c). If you don't need internet for your XP VM, press Next.
i) Select Use an existing virtual hard disk and browse for the VirtualXPVHD.vhd file from Step 3, as shown below. The Location path will vary in your case.
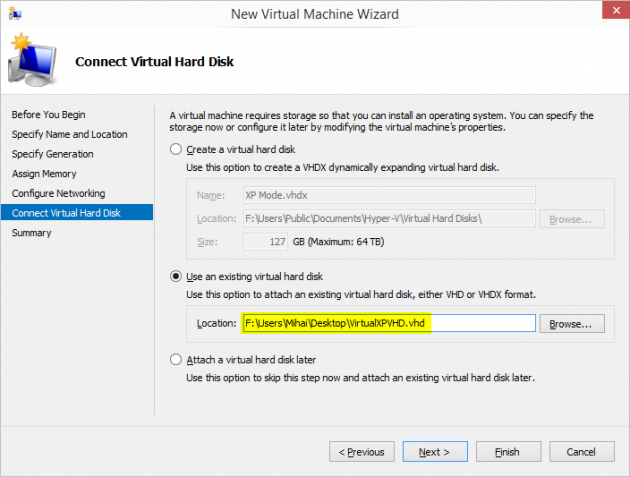
j) Click Next for Summary, then Finish.
Your XP Virtual Machine is now created.
6. Run the virtual machine
You need to connect to your newly created XP virtual machine and start it. There are several ways to do that.
a) One way is to click Connect under your XP VM, in the right Actions column, as shown below.
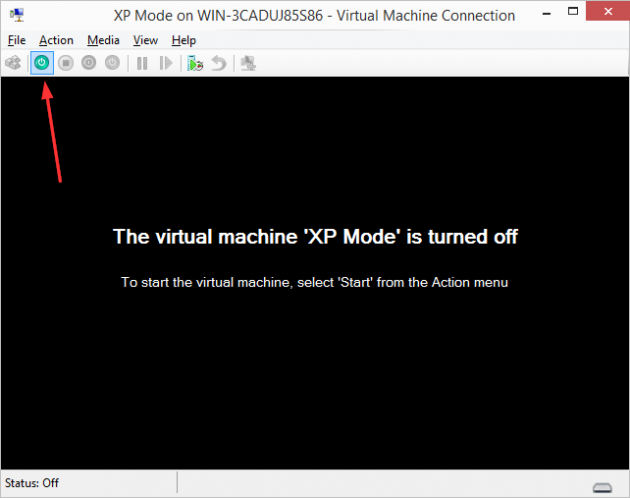
b) In the new window that opens, click the green Start button. See the image below for clarification.
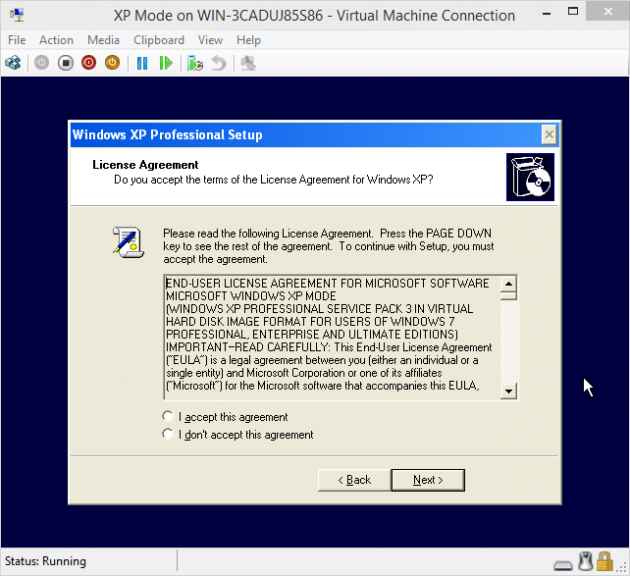
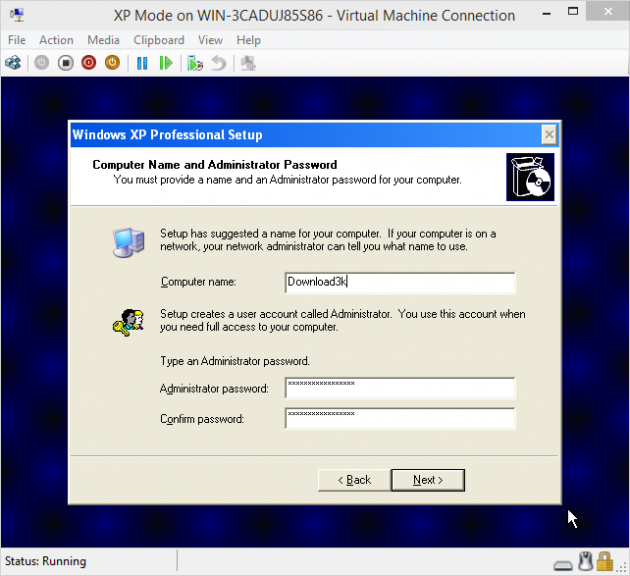
c) The first time you start the VM, it will do the last steps of a regular XP installation. It won't go through the full XP installation, but you'll still need to agree to Terms, pick a computer name, set time and date, language and, after a final reboot, it will prompt you to configure updates.
That's it. If everything went ok, you should now have a working XP Virtual Machine inside your Windows 10 (or 8). Bonus tip: Create a shortcut for this Hyper-V Virtual Machine.
Alternatively, you can read this guide "How to test Windows 10, 8, 7, Vista, XP for Free, Legally" and see if it suits your needs better.
Later edit to cover network connectivity troubleshooting:
Make the Internet work on the XP Virtual Machine
If the internet connection is not working on your newly created XP Virtual Machine, here's what you can try:
- Turn off the XP Virtual Machine.
- Open its settings window. You can do this in several ways:
- a) From the Hyper-V Manager, select the XP Virtual Machine and, in the right hand pane, click Settings.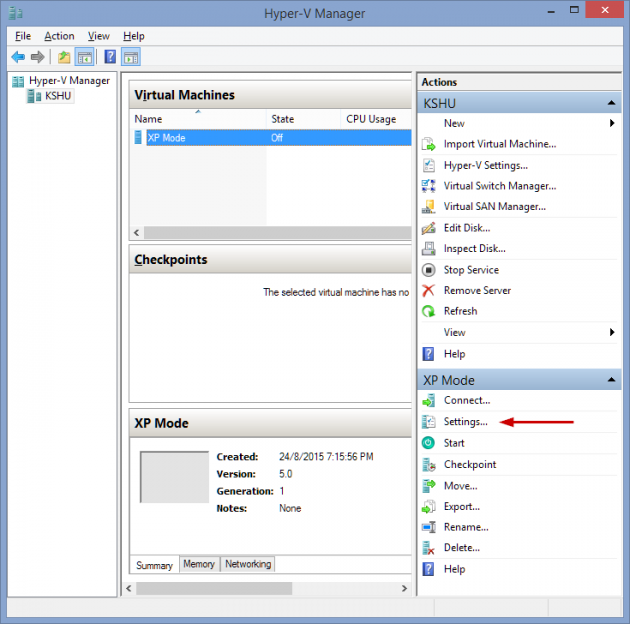
- b) If the XP VM window is active, you can click File > Settings.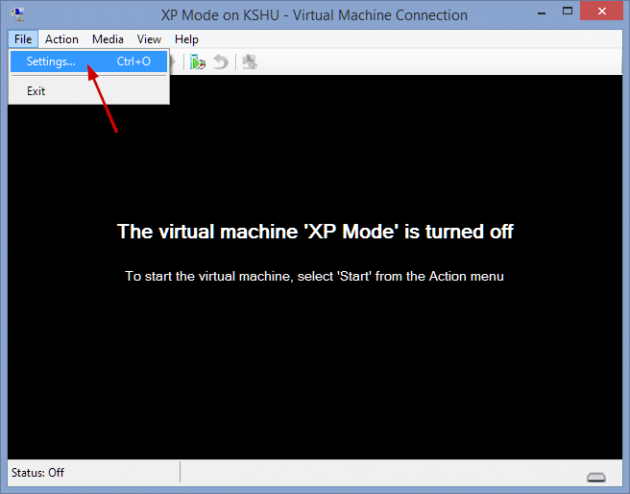
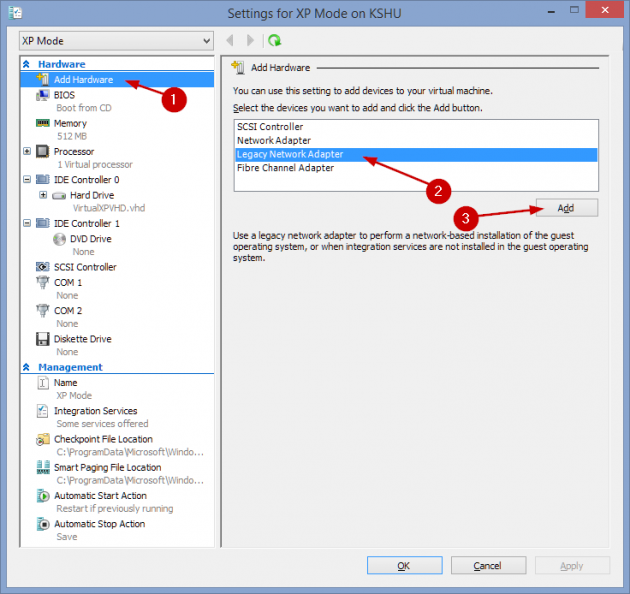
- In the Settings window, simply Add Hardware > Legacy Network Adapter. The Add Hardware option is the first one in the Settings window.
- Make sure the Legacy Network Adapter is set to use the previously created Virtual Switch (External).
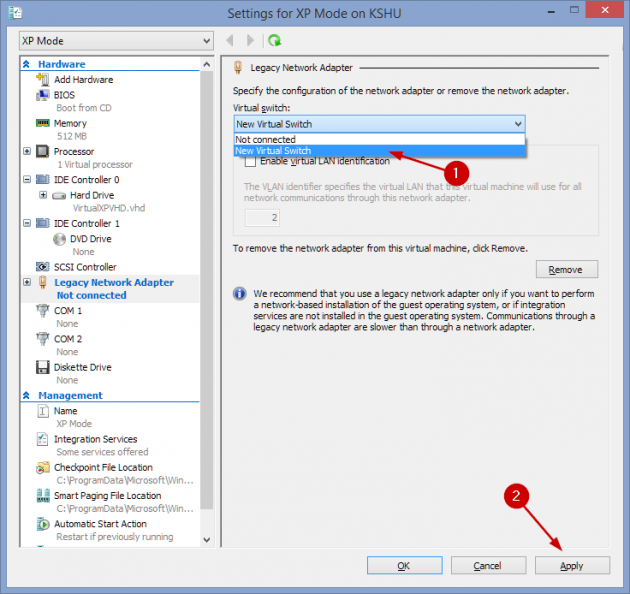
- Click Apply/OK and start the XP VM again.
It should result in a quick driver install in the VM and, afterwards, the network should work inside the VM.

-
-
-